|
From Raw File to Master File
Other essays in this series
Introduction
What an image looks like before and after optimization in Photoshop is often a mystery. I myself wonder about the process that other photographers follow, even though I know that the original file and the final prints are usually quite a ways apart.
This mystery, so to speak, is often compounded by the fact that many photographers pretend that, and I quote, the final prints are literal reproductions of the original Raw files.
Not so. It never was the case with film and it is even less the case with Raw files. Why? Because both film and Raw files are not a representation of the artist's vision. They are a representation of what the camera captured. To translate this capture into what the artist saw a lot of work needs to be done. This work was done with film images and this work continues to be done with Raw files.
With film photographs little was written about this process except in regards to black and white printing. Starting with Ansel Adams and continued by many other photographers, the process of transforming (yes, it is a transformation) a black and white negative into a black and white fine art print was carefully documented.
However, when it came to color little was written about the process. The audience was left to believe --and led to believe in some instances-- that a fine art color print was a literal reproduction of the color transparency or the color negative. Not so. While different from the process of printing black and white negatives, color fine art printing involved numerous operations and yes, manipulations if you wish to call it that, or enhancements or optimizations if you prefer these two other terms. At any rate, a fine art color print, when completed, bore little resemblance to the color transparency or negative it originated from.
The number of changes made from film to print varied from image to image and from photographer to photographer. These changes were based on the technical challenges offered by each film image and on the vision of each photographer.
Little has changed today when working with Raw files with the goal of creating a fine art print. The first difference has to do with the way each operation is performed. We now do this on a desktop with a computer and software instead of in the darkroom with an enlarger and chemicals. The second difference has to do with how much more we can do on the computer and with the repeatability of the process. We can do a lot more, and are thus able to "rescue" originals that were impossible to print in the darkroom. We can also make part of the proces repeatable to some extent, although final corrections continue to be necessary. There is, eventually, no substitute for the knowledge and the vision of the artist, no matter how technically capable our tools have become.
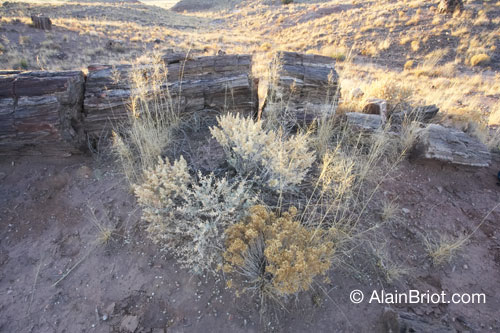
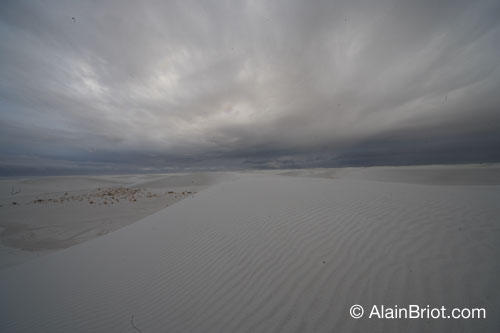
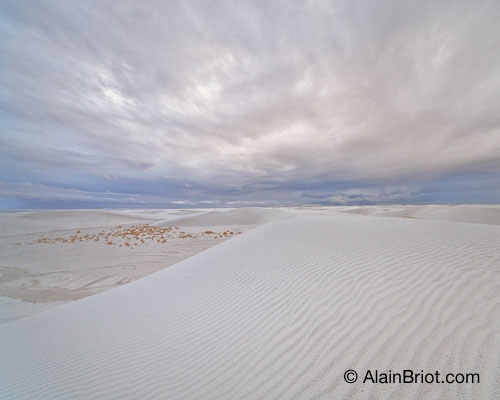
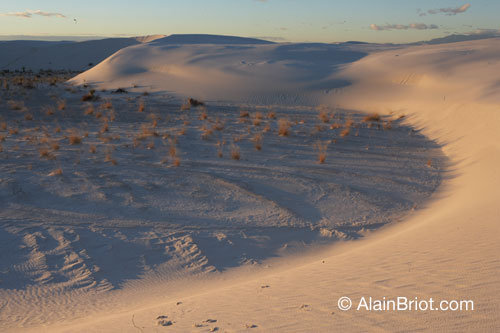
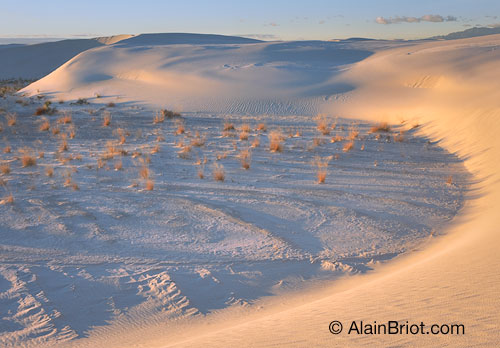
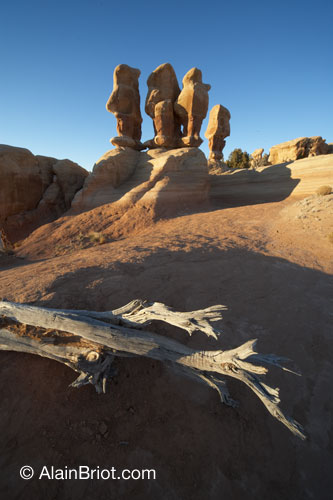
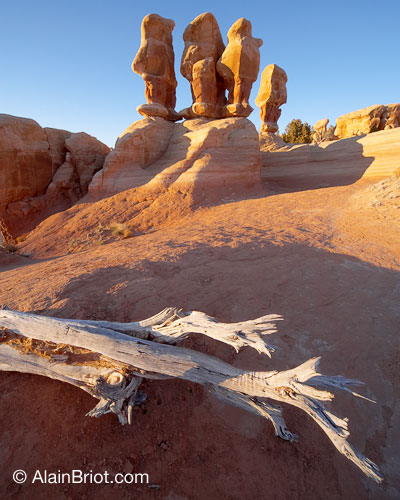
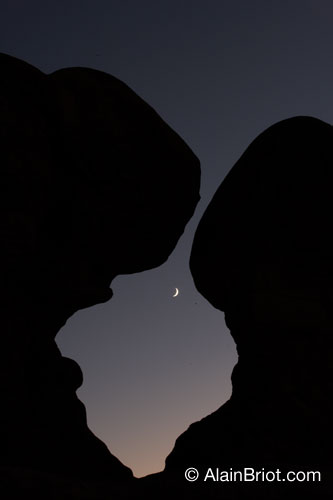
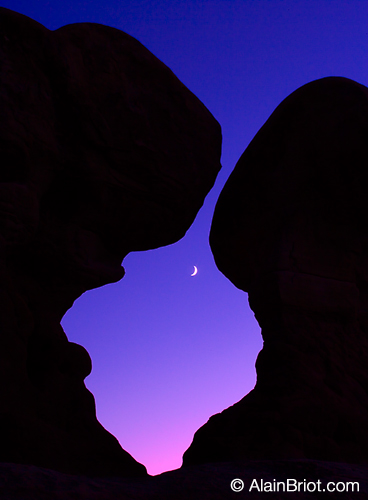
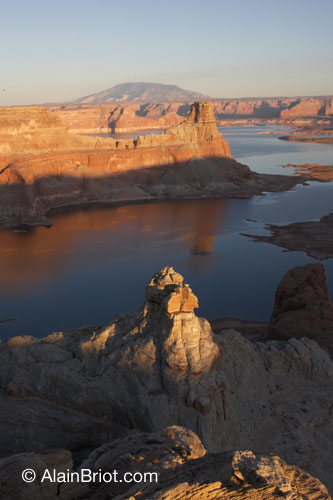
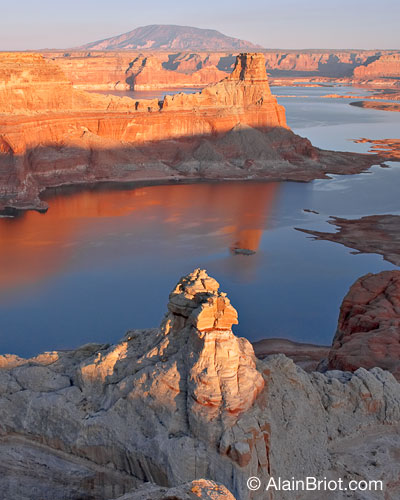
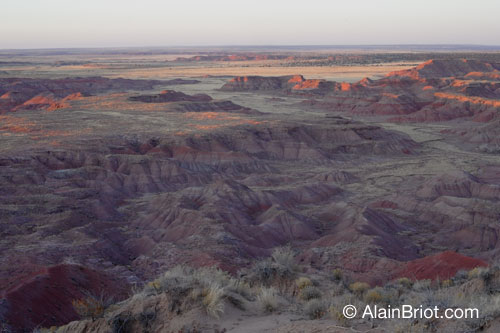
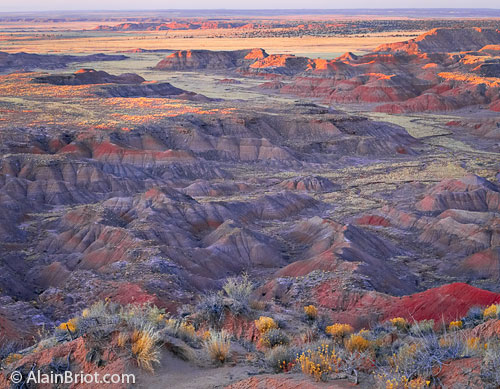
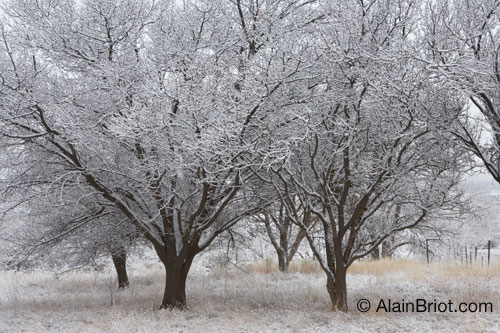
So how far apart are the raw file and the final print file? The answer to this question is below, in the several examples that I offer on this page. For each image, on the left is the original raw file, presented exactly the way it was exposed, with no changes done in the raw converter whatsoever. All I did to the Raw file is save it as a jpeg so that I could post it on this page.
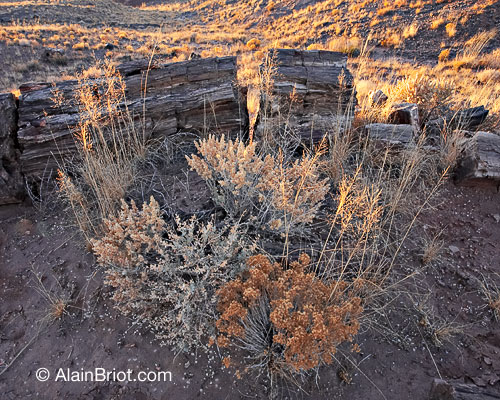
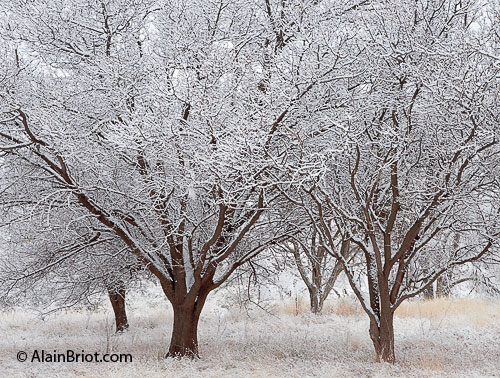
On the right is the final print file, also called the Master File. If you are not familiar with the concept of Master File I describe it in detail in another essay available at this link. The master file is the file I use to make my fine art prints. I occasionally make changes to the master file based on my continued desire to further my vision for each image, so some of the Master Files below may look slightly different in the future.
The number of differences between Raw File and Master File varies. However, it is always quite significant. Why? Because cameras do not capture the world the way artists see the world. Cameras capture raw files in a desaturated, low contrast, and somewhat soft manner. The colors need to be enhanced. The contrast needs to be corrrected. Occasionally, elements need to be removed and dust taken out. Grain may have to be reduced. Halos may have to be taken out. The image needs to be sharpened. Sometimes cropping needs to be done because the world wasn't meant to fit in a given camera format. Finally, countless other optimizations performed in such a way as to create an image that conveys the vision and the feelings of the photographer and not just the technical output of the camera. The camera captures the material aspect of the world. The artist brings out the spiritual aspect of this world. Fine art photography is the combination of both.
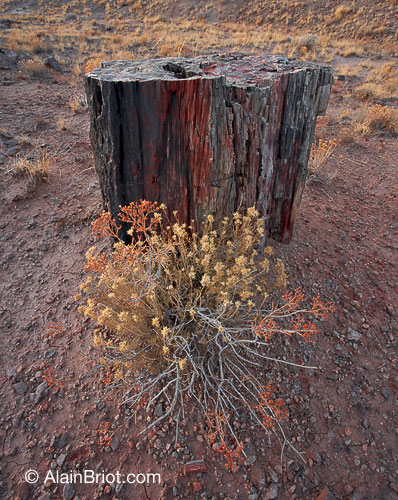
Little Petrified Forest #1
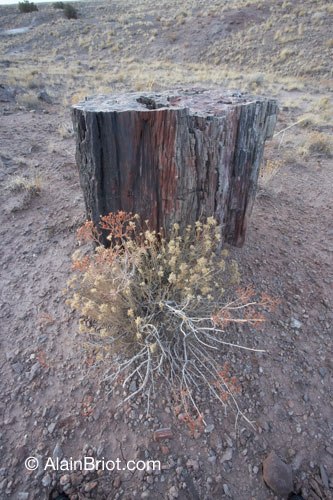
Little Petrified Forest #2
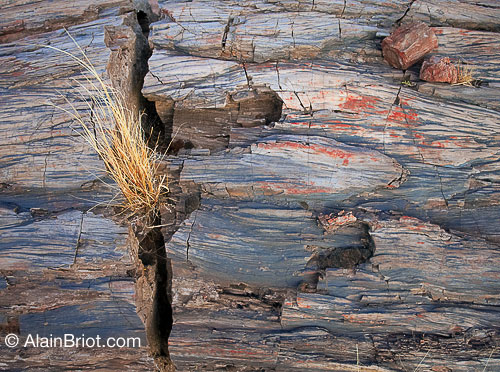
Little Petrified Forest #3
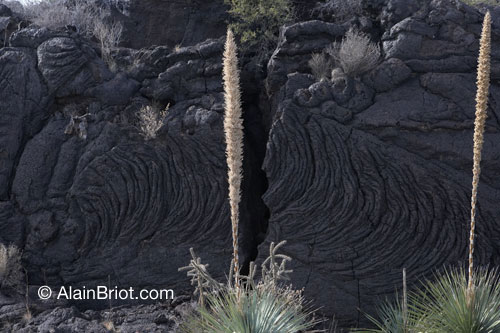
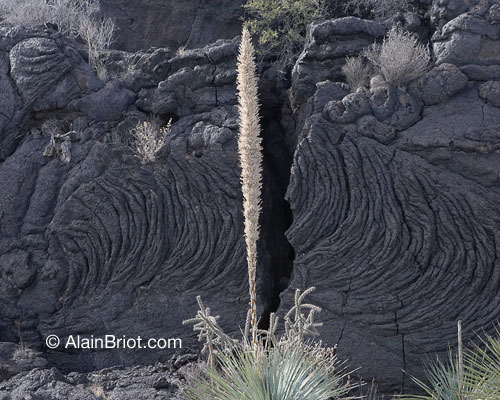
Yucca in Lava Flow, New Mexico
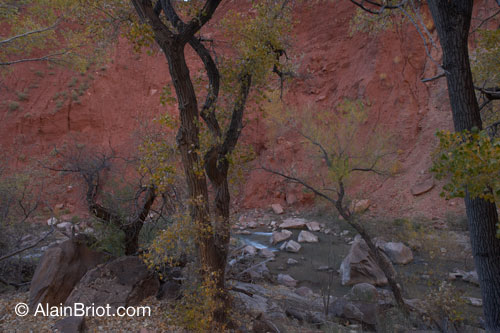
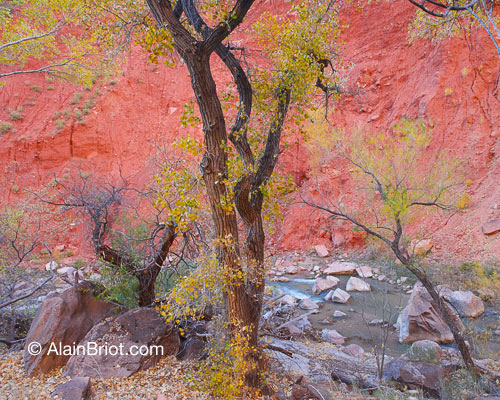
Trees along the Virgin River #1, Zion National Park, Utah
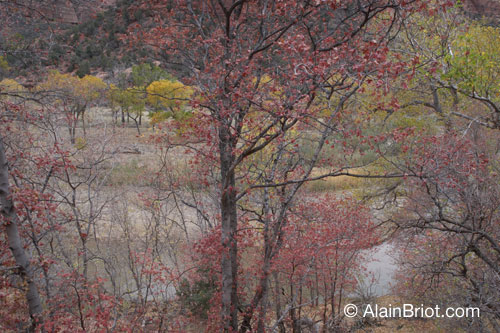
Trees along the Virgin River #2, Zion National Park, Utah
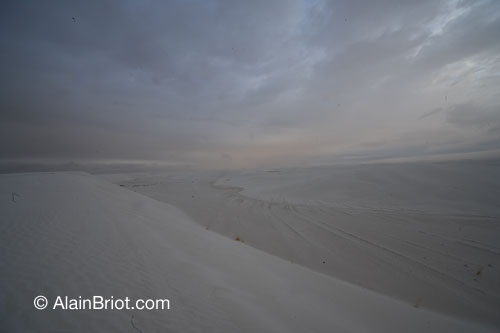
Clearing Storm at Sunset, #1 White Sands National Monument, New Mexico
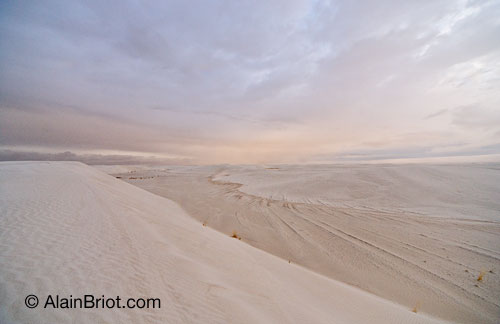
Clearing Storm at Sunset, #2 White Sands National Monument, New Mexico
White Sands Sunrise, White Sands National Monument, New Mexico
Sandstone Statues, Escalante Wilderness, Utah
Moonrise, Escalante Wilderness, Utah
Lake Powell, Northern Arizona
Painted Desert, Eastern Arizona
Trees after an Early Winter Snowstorm, North-Eastern Arizona
The workflow I follow from Raw file to matted fine art print is described in great details in my Printing Mastery Workshop on DVD. If you want to know how to sell the fruits of your labor. I detail how this is done in my Marketing Mastery Workshop on DVD.
The other option I offer to study my process is to attend my Fine Art Photography Summit. This is an annual event during which students photograph, process, and take part in classroom presentations, over the course of a week. All the details are on the Workshops page.
Alain Briot
Essay and photographs Copyright © Alain Briot 2007
All rights reserved worldwide
.
|
 |
|
|
|
|